Friday, December 14, 2012

An Oldtime Pinball Machine for the Game Room

We love hanging out in our basement family room/ game room.  We collect vintage games such as Pachinko and some old ball shooter games.  Today as I was on our local 'Craigslist-like' online marketplace, I saw an ad for an old pinball machine.  I do a lot of garage-saling and looking online and have not seen one like this before.  I thought it would look great in the game room.  Of course, it was crazy-worry time for me as we had to drive home 30 miles with it in the back of the truck.  Luckily it made it and my worst "old pinball machine strewn all over the freeway" fears didn't come to pass.  :)


I absolutely love the graphics painted on the sides of it.  We think it is a pretty old one based on the birds' eye maple wood on the edges and legs. 
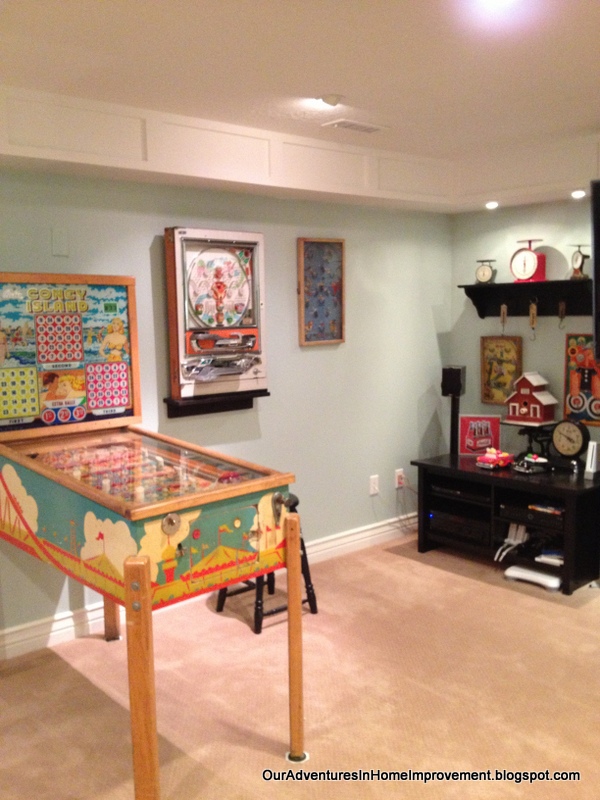


My very handy husband will be digging into it soon and hopefully get it working perfectly again.  In the meantime, I'm just excited to have it!
 
Thanks for your visit!
 
Pam

With the rest of the world, my thoughts and prayers are with Newtown, CT.


I am linking to the following parties:


DIY Show Off
vif187

Sunday, December 9, 2012

Bird Pillow for Christmas and Beyond

I found this cute bird graphic the other day.  I love, love, love anything with birds on it and love that I can incorporate it with my Christmas decorations.  Of course I intend to keep it out long after Christmas!


I started with this graphic from The Graphics Fairy
 
 
I printed it off on Jolee's Easy Image Transfer Sheets using my inkjet printer.


I cut around the edges.
 
 
I used a Ritva pillow cover that I bought from Ikea last year. 


I put the pillow cover over a board and a pillow case.


I followed the directions on the Jolee's label--twenty seconds on each part, lift up carefully, then set the iron back on another place.  I made sure I got each area several times for 20 seconds each.


I let it cool for 10 minutes, then carefully pulled the backing off of the transfer.
 
And here's the finished pillow.  Easy and Festive!


Thanks for your visit!
 
Pam


I am linking to the following parties:


The Graphics Fairy
UndertheTableandDreaming
My Uncommon Slice of Suburbia

Sunday, December 2, 2012

It's Ornamental! Easy Christmas Decorations

I collect antique apothecary jars and display them on my mantel.  At Christmas I like to change them up by taking out the candy and putting glass ornaments in them.  It's a great way to bring Christmas color to the mantel and most importantly, I don't have to find a place to store the jars during the holidays.


A few years ago when I was changing out the jars, I decided to also change out the things on my candy scales.  I love them in there too.


This picture doesn't do the shininess of the ornaments justice.  They really pop in here.


Well, I was on a roll with the ornaments this year and decided to add them to an old canning jar.  I'm really happy with this look too. 
 
 
So there you have it.  A super-easy, super-inexpensive way to bring in some Christmas color.


Thanks so much for your visit and comments!
 
Pam
 
I am linking to the following parties:


>

Friday, November 30, 2012

Chip Wade Answered My Home Improvement Questions

Recently I was asked if I'd like to submit any questions on home improvement to Chip Wade. Of course I would.  I love watching him on HGTV.

As I've posted before, we recently had our walnut floors refinished.  With Christmas parties coming up, I wanted to know if there was anything I could do to keep the floors looking great while relaxing about having a number of people on them.  Chip gave some very good advice on this.


A couple of the other questions I asked were for a friend with a very old house.  She's recently replaced windows and wanted to make sure the new stucco looked good and didn't leak around the new windows.  He gave very precise instructions on how to make them look great.

My last question was regarding a new toilet.  Chip suggested the Delta Corrente toilet that is made for easy installation, easy cleaning and with little chance of leaking.  It sounds like it's a great alternative to some of the others out there.  And, the best part is that it's under $200 and available at our favorite store, The Home Depot!  :)

Here's the video of Chip answering my questions.  I'm thrilled that he took the time to answer mine!


I was compensated for participating in this.  My opinions of Chip Wade and The Home Depot are my own.


Thanks so much for visiting!
 
Pam

Sunday, November 25, 2012

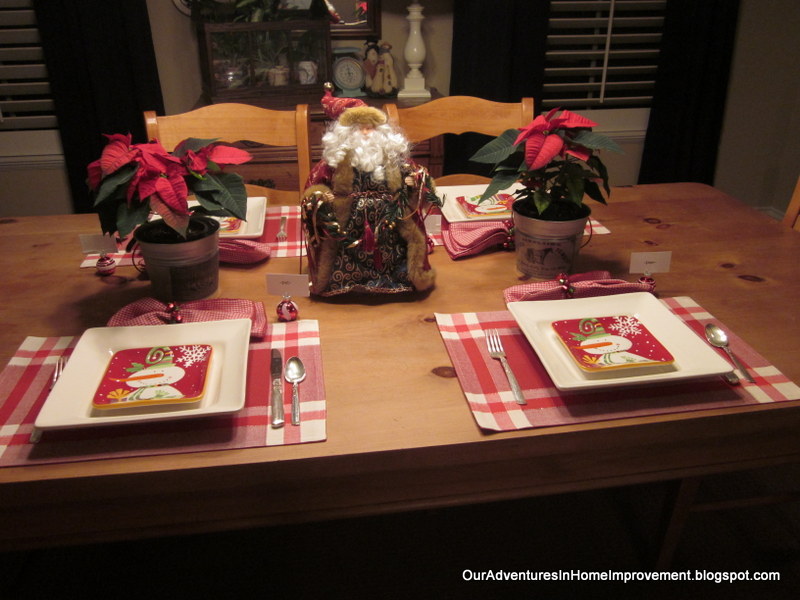
Simple Red and White Christmas Table

I love seeing pretty Christmas tables.  I love gingham and plaid fabrics, especially in red.
 
Yesterday I was on a mission to find some dishes to go with some square white plates that I already had.  I was so excited to find these snowman plates from Pier 1.  They were exactly what I'd had in mind and were on sale to boot!


I used my Mom's silver, which I am so happy to have. 
 
 
I was thrilled to find the gingham napkins, pretty bell napkin rings and plaid placemats at Pier 1 as well.
 
 
Even though we always sit in the same places at our table, I think the placecard holders are cute.


I used  a Santa that was my Mom's for the centerpiece and poinsettias in galvanized pots.
 
I'm trying to simplify my decorating this year.  I like how this  looks festive and was easy to do. 
 
Thanks so much for your visit!
 
Pam


I am linking to the following parties:

Debbiedoo's Newbie with a Twist Party


>

Saturday, November 10, 2012

Thanksgiving Pilgrim Hat Dessert


I have been making these Pilgrim hats for several years and they are always a big hit at Thanksgiving. And the best part is, they are EASY!

You will need:

  • Chocolate cookies (I used Keebler Striped Shortbread and turn them over)
  • Reese's individually wrapped peanut butter cups (unwrapped) :)
  • Orange frosting in a tube


Place the cookie striped side down, put a little frosting under the Reese's Peanut Butter cup. Set that in the center of the cookie.


Take the orange frosting and put a bead around the bottom of the Reese's.  Make a square on it to be the buckle.  And you're done!  How much easier could that be?!


Some of the orange frosting looks a little crazy, but I don't worry too much.  As soon as the kids see them, they're gone--crazy buckles and all!
 
 
Thanks for your visit!
 
Pam


I am linking to the following parties:

Debbiedoos Newbie Party with a Twist